Sequence viewing > Index - Digital Post Production - Resource - ©
Lloyd Godman
Vignette in Photoshop
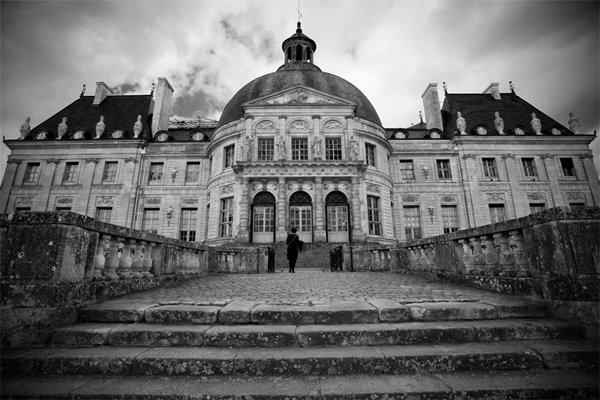
Often we seethe use of a moody vignette around the edge of each image where the center is darker and the centre lighter. This technique centers the visual energy in the image and intensifies it in the center. The outside might also be blurry with the center sharp.
Vignette (pronounced vin-’yet) is sometimes seen in older black & white photos, Diana camera or Lomo shots, where the image fades out toward the edge.
It was used in traditional analogue techniques in the darkroom with film and paper, where the photographer would expose the outside of the image for longer during the exposure to gain this darkness, this process is unforgiving and takes some understanding of the process and a high degree of practice and skill. From the photographers perspective, as the exposure is happening there is no notice change on the paper. The effect is only visible once the print has been developed in the chemicals. There is only one shot at getting it right, if she get it wrong the print is ruined. This technique of burning in areas with more light and holding back other areas to make them lighter was used by many photographers to create intensity in the image.
However when we simulate the same visual effect with a digital image in photoshop, not only do have great control over very small areas of the image and see the effect in real time, we can enhance the vignette effect on image in a layer which allows us to tonally readjust it at any point. You can also add a vignette that adds blur to the outside of the image.
If we save the image as a Tiff and retain the layer, if we are not happy with the effect we can alter it at any point in the future.
The following sequence are for a vignette in Photoshop SC5 non-destructive and easy to adjust. There are other ways to do it directly on the image but this destroys pixels.
If you are doing other adjustments in photoshops with many layers, DO THIS AS YOUR LAST STEP IN PHOTOSHOP. We will do the vignette in both Colour and B&W
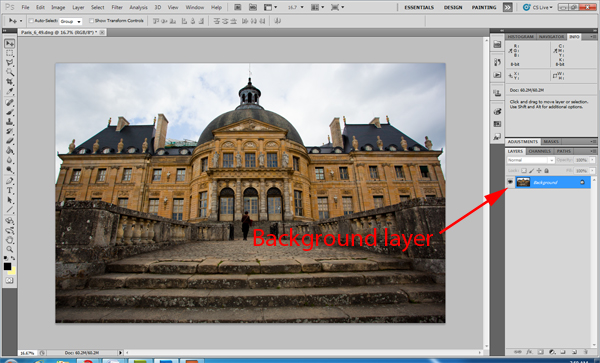
1. Open the selected image. You will see the image as a background layer. ( you can open the layers for viewing - through - window > layer or simply F7) |
 |
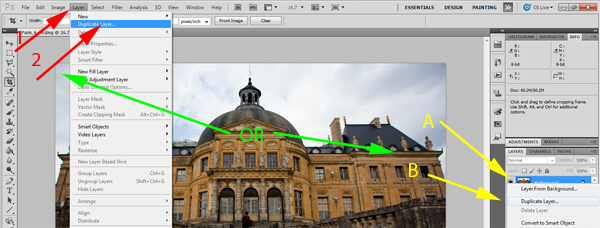
So we are not working on the original - duplicate the layer. This way we will not destroy the original
We can do this by LAYER > DUPLICATE LAYER
or RIGHT CLICK ON THE LAYER |
 |
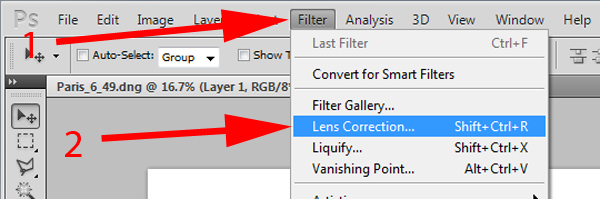
| Working on this layer
Filter > lens correction
or
Shift + Ctrl + l R |
 |
This will allow you to adjust a range of settings
1 Open Custom rather than Auto
2. This set the darkening around the perimeter - in this case set to - 76
3. This set the lightening in the center in this case set to +66
Then click OK
|
 |
| The image will have a corresponding Vignette |
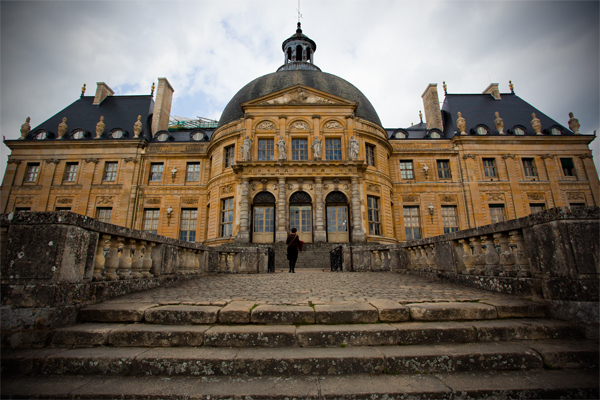
Mouse over to view original before vignette |
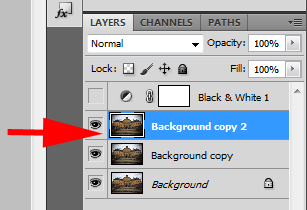
| Here I have added a B&W Layer to reduce the image to B&W |
Mouse over to view original before vignette |
We see the B&W layer in the layers palette
No copy the layer again
|
 |
Open Filter > Blur > Lens Blur |
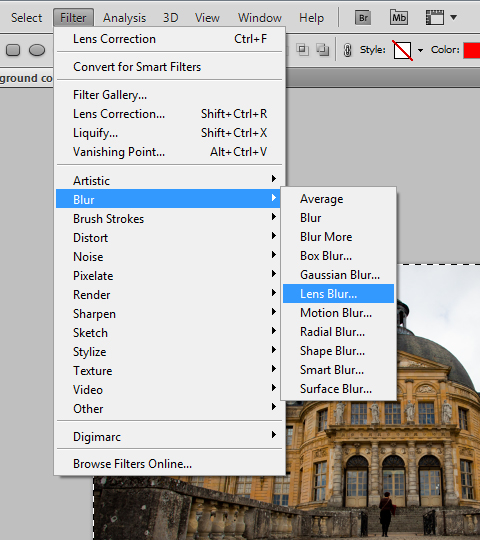 |
This is the result - the whole image is blurred |
 |
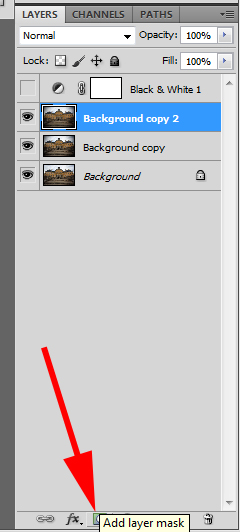
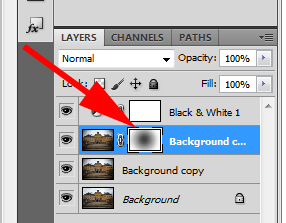
Now add a layer mask to the layer that has been blurred
|
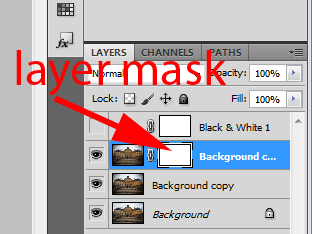
We see this come up as a white rectangle in the layer. This means we can paint into the white to create an effect. |
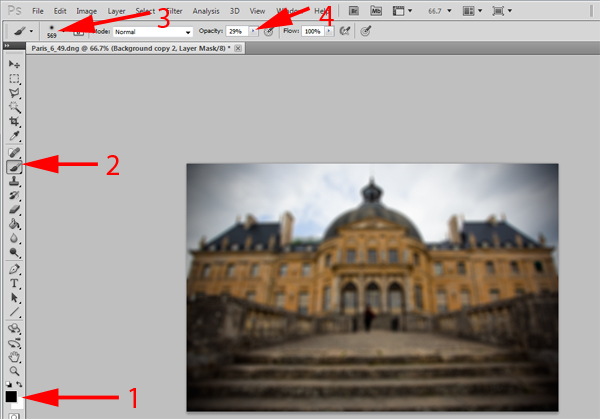
1. So we want to select the foreground colour as Black and background colour as White
2. Select the brush
3. Alter the size of the brush to suit
4. You can alter the opacity ( transparency or how great the effect will be)
|
 |
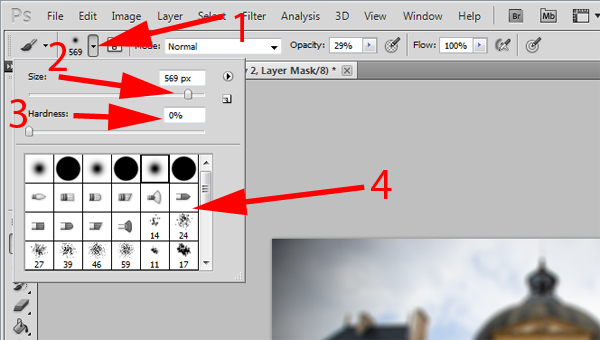
1. When we click on the Brush
an options palette will open that allows us to adjust;
2. the size
3. the hardness - In this case we want a soft brush where the edge fades off so we select 0%
4. a range of other brush shapes
|
 |
| When this is applied to the center the mask reveals the layer below in only the area the brush is applied in. |
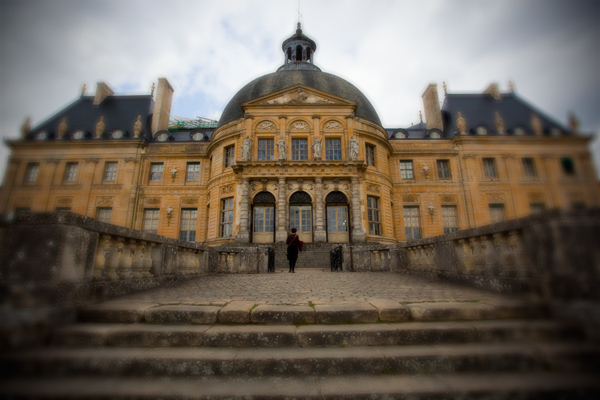
mouse over to view B&W image |
Here we see th mask associated with the layer now has a black area that corresponds to where we applied it
If we save the image with all the layers as a Tiff - we can open the image and apply th eblack brush again for greater effect or change the foerground colour to white and apply it to reduce the effect.
|
 |
Want to learn more? - do a workshop or one on one with Lloyd Godman
|