Sequence viewing > Index - Digital Post Production - Resource - ©
Lloyd Godman
Colour Saturation adjustment - Raw file and Photoshop
colour saturation can be adjusted to either reduce the colour intensity in an image or increase it
there are various means of doing this we can either do it through the RAW file converter where we can save the settings and readjust it at any time - this means we do not loose any of the information

|
Here we see the image opened in the raw file converter not the saturation slider lower right with the red arrow
the setting on the original image is - 0
Click on image to enlarge |
|
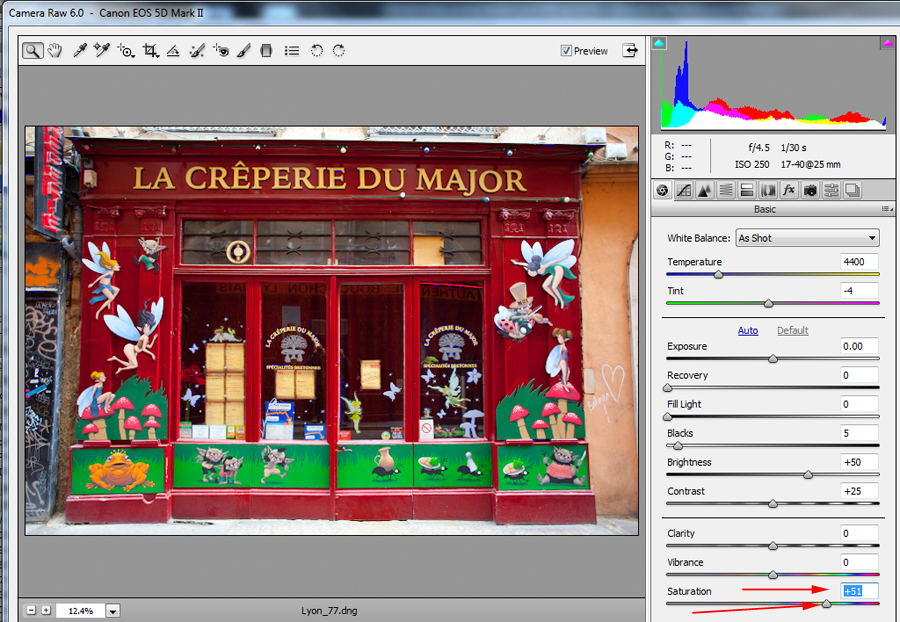
Here the saturation has been increased to
+51
mouse over to view original image
- notice the histogram at the top right showing the difference in colour
Click on image to enlarge |
|
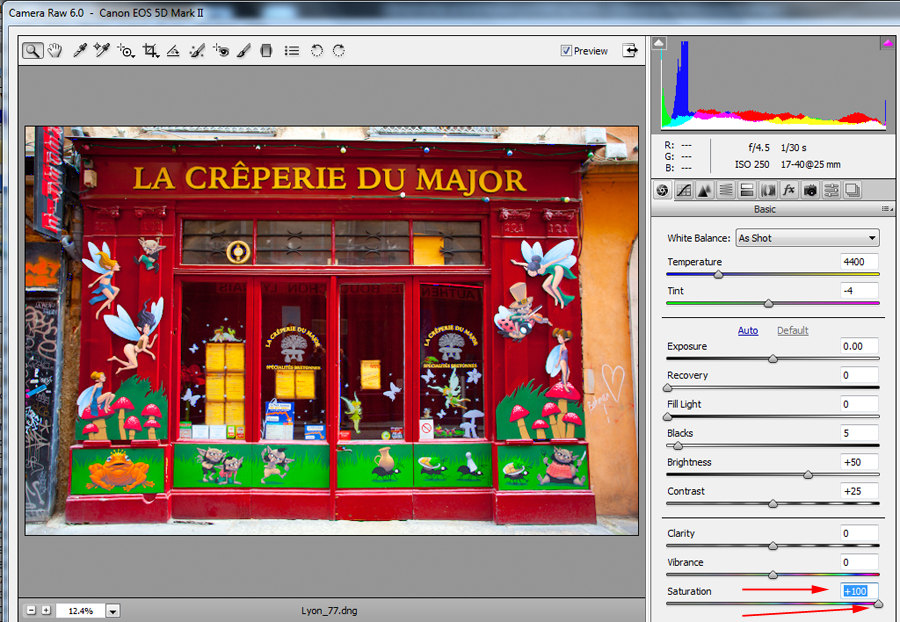
Here the saturation has been increased to
+100
mouse over to view original image
- notice the histogram at the top right showing the difference in colour
Click on image to enlarge |
|
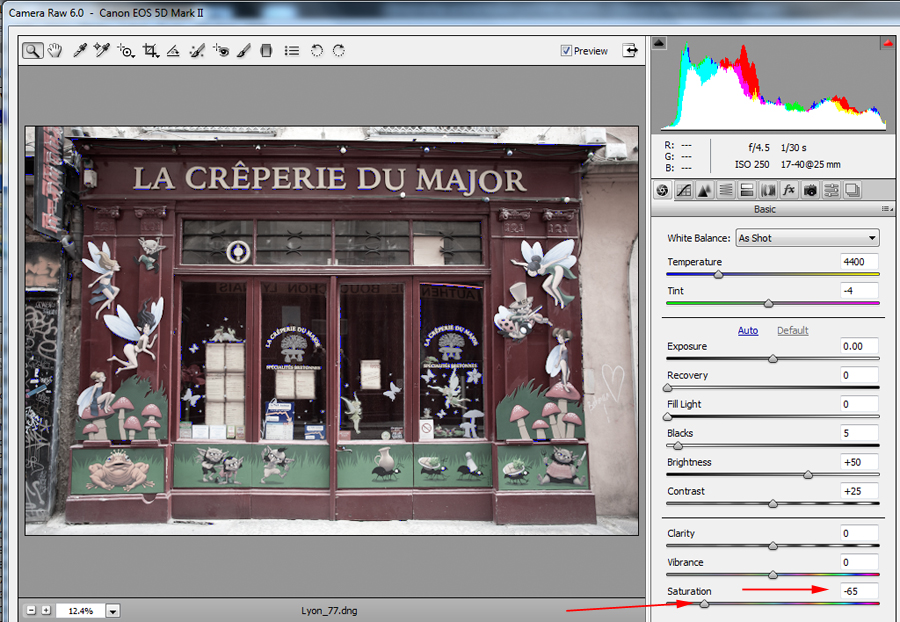
Here the saturation has been decreased to
-55
mouse over to view original image
- notice the histogram at the top right showing the difference in colour
Click on image to enlarge |
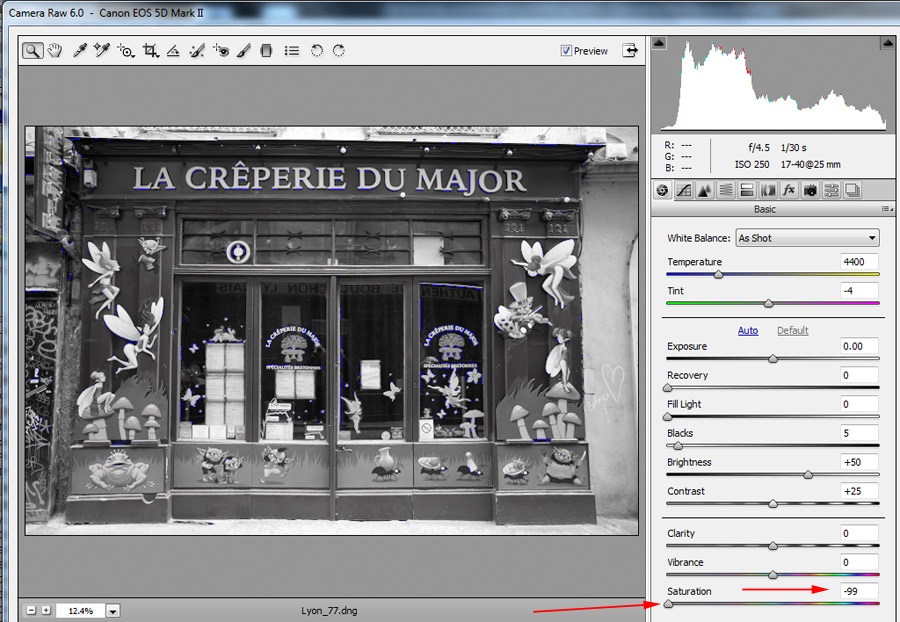 |
Here the saturation has been decreased to
-99
mouse over to view original image
- notice the histogram at the top right showing the difference in colour
Click on image to enlarge |
| |
|
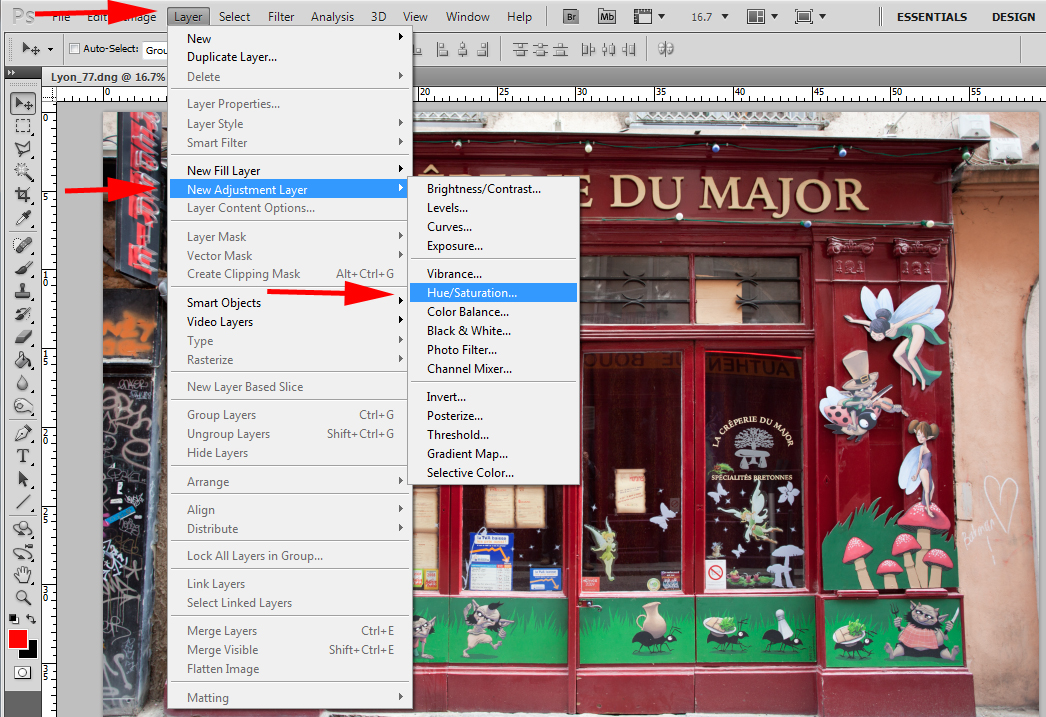 |
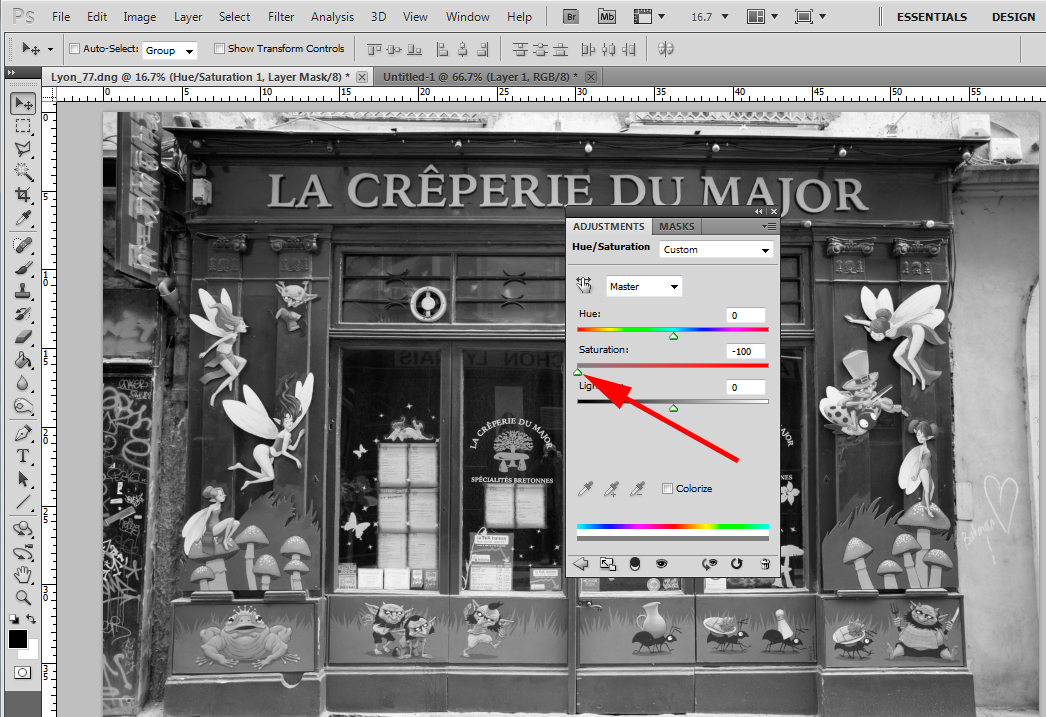
The image saturation can also be altered in Photoshop -
do this by using an adjustment layer
Click on image to enlarge
|
 |
Click on image to enlarge |
Want to learn more? - do a workshop or one on one with Lloyd Godman
|

