Often the images we take are too large and we need to resize them. In fact many digital cameras now produce images much larger than is needed for general use. Shooting and storing the original files as large as possible allows the images to be printed at a high quality at a larger physical size. However they also take longer for the camera to process, take up more storage space on both the camera storage chip and computer storage device, and more RAM when you are working on them. Give some consideration to what you need the images for and select an appropriate camera and image quality setting when shooting. But remember that image can always be down sized but lose quality if you want to up size. So larger files can be down sized for a particular use or application.
For instance, we might need to resize them to attach on an email, place on a web site, or a mobile device. Here is some information on how to resize you images in –
Photoshop
Microsoft office Document Imaging
GMP
Picasa
PIXresizer
Some of these are free! Or if you type - free software to resize a photograph – in google you will find many others
Getting images
from various sites on the web can be difficult. Some sites don’t
allow you to download the images and sometimes the images are huge.
To make the course run smoothly we have to keep the total size of your
files down to 2mb if they are too large they take ages to download.
If there
are images on any computer screen that you wish to make a copy of you
can simply press prt sc ( print screen) on your key board - you will
most likely have to hold down the Fn (function) key while you do this.
When you do this, you have made a image copy of all the information
on the screen and can now paste it into photoshop or many other programs.
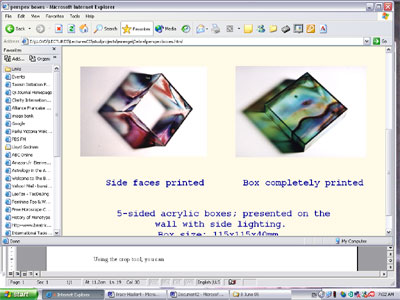
So in Photoshop
- Go to file new and paste in photoshop.
Because
you copied the full screen, you will probably end up with an image
that has all sorts of strange extraneous info around it.
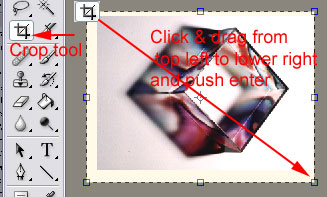
Using
the crop tool from the main tool bar in photoshop, you can crop
it to size. You can use any of the points marked with a square -
to move the crop area to where you want it. Up or down - side to
side etc.
Resizing
the file
If the file
size of an image is too large (perhaps it is one of your images from
a camera that is 8mp and you need to reduce the file size to email or
place on the web) you will need to resize it in photoshop.
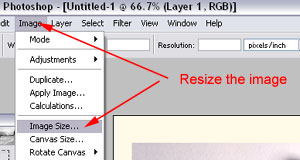
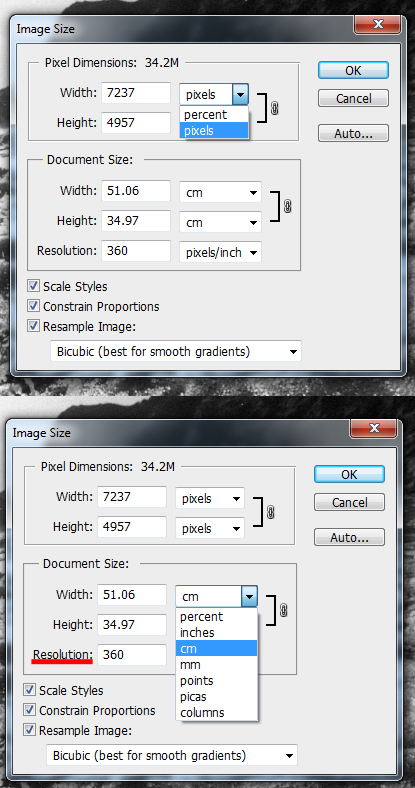
Along the
very top bar - Go to Image – Image size and you will bring
up a box that looks like this.
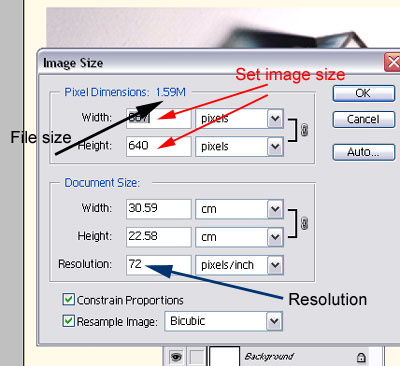
You can change the physical dimensions of the
image with width and height.
Before you do this check the resolution. The
web operates on 72ppi, if you have scanned it or it is an image
from your digital camera, the resolution might be quite high.
Set it to 72 and you will notice all the other figures like width,
height, and file size change automatically.
The file size
will alter at the top left under - Pixel Dimensions.
It
is important that you save it as a different file name if you
want to keep the original intact.
For
the web you can reduce the file further saving though save for
web.
Resizing
in Microsoft office Document Imaging
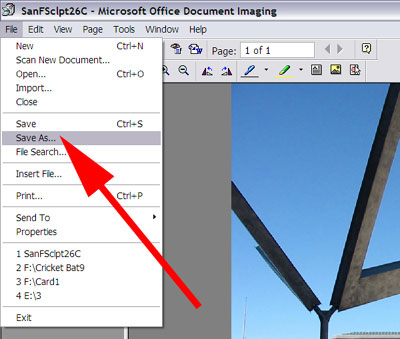
Open the image in Microsoft
office Document Imaging - The resizing of the image is done when we save
the image.
Along
the top tool bar click on File, then save as a file of your choice
–
here it is a good idea to call it another name say 20061A rather
than replacing the existing file 20061. So always look to keep
your original files intact
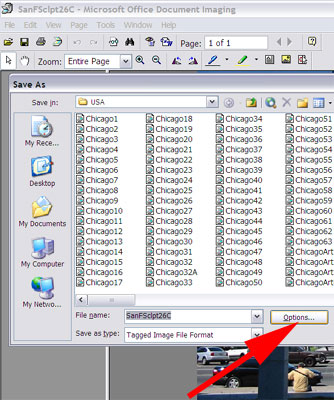
Then click
on options
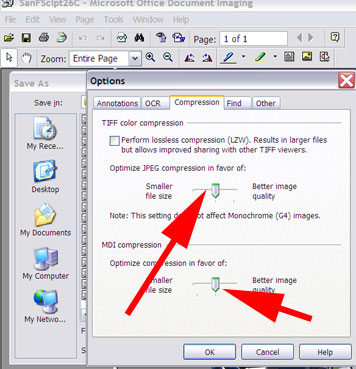
This
will bring up a box that will allow you to alter the compression
of the image.
You might need to experiment with this until you find the right
settings to down size the image appropriately. Remember to save
the file with a new file name or you can over write the existing
file and lose the higher quality image forever.
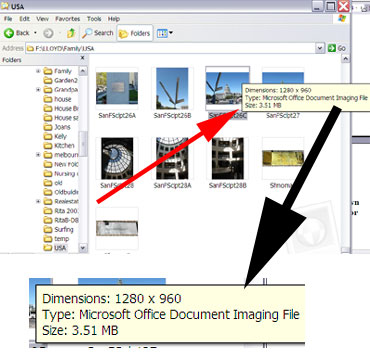
You
can check the new file size by looking at the details in windows
explorer. Remember that your total file size for each activity
should be 2mb or less.
The image above is reading 3.15 MB so it needs resized to say
about 400KB .
You
may need to save it as a different file name if you want to keep
the original.
GIMP
"GIMP is the GNU Image Manipulation Program. It is a freely distributed
piece of software for such tasks as photo retouching, image composition
and image authoring. It works on many operating systems, in many languages."
http://www.gimp.org/
this is actually
a better written piece of software than PhotoShop...and its completely
free.
http://gimp-win.sourceforge.net/
above is link to the Windows Installer. GIMP is also ported for Mac
OS X and Nix.
you may need to save it as a different file name if you want to keep
the original.
Picasa
http://picasa.google.com/
Picasa is software that helps you instantly find, edit and share all
the pictures on your PC. Every time you open Picasa, it automatically
locates all your pictures (even ones you forgot you had) and sorts them
into visual albums organized by date with folder names you will recognize.
You can drag and drop to arrange your albums and make labels to create
new groups. Picasa makes sure your pictures are always organized.
Picasa also makes advanced editing simple by putting one-click fixes
and powerful effects at your fingertips. And Picasa makes it a snap
to share your pictures – you can email, print photos at home,
make gift CDs, instantly share via Hello™, and even post pictures
on your own blog.
PIXresizer - Free Image Resizer
http://bluefive.pair.com/pixresizer.htm
PIXresizer is a photo resizing program to easily create web and e-mail friendly versions of your images with reduced file sizes.
The reduced files are saved in a different folder, so your original images are not altered at all. PIXresizer offers several different resizing methods to choose from and can automatically recognize image sizes to calculate the best fit. In addition, it can convert between image formats (JPEG, GIF, BMP, PNG and TIFF), rotate images, convert to grayscale and resize multiple images in batch mode. A great companion for webmasters and digital photographers.
Here is some info on keeping a word document small -
Hi guys I googled it, and finally found an answer... so stop looking :)
The problem was that I was copying and pasting my pictures directly in the Word doc. The solution is:
"The best way to keep a Word doc small is to only insert photos as a jpeg. Never copy and paste a photo directly into Word. Use an image editor to crop and reduce the image size to 1200W x ????H pixels or less. Save the image as a jpeg and then use “Insert” > “Picture” > “From File”. I used this technique on a file with 10 pictures and it went from 20.8Mb to 1.12Mb."
One more question that I have though, is how do I edit or delete my posts on blackboard? Like if I wanted to delete my first post (since I found a solution) or add this current post in the first post as an 'edit' how would I go about it?
Cheers
Matthew John Ryan BOJE
To easily re-size your images, download the 'Microsoft Image Re-sizer' found here - http://www.microsoft.com/windowsxp/Downloads/powertoys/Xppowertoys.mspx
It's on the right-hand side in the lower half of the page.
Once installed, it will allow you to right-click on an image and select 'resize', giving you a few resizing options. After that, you can copy and paste the file into MS Word with ease.