|
There are various ways we can do this with text
but here is one method
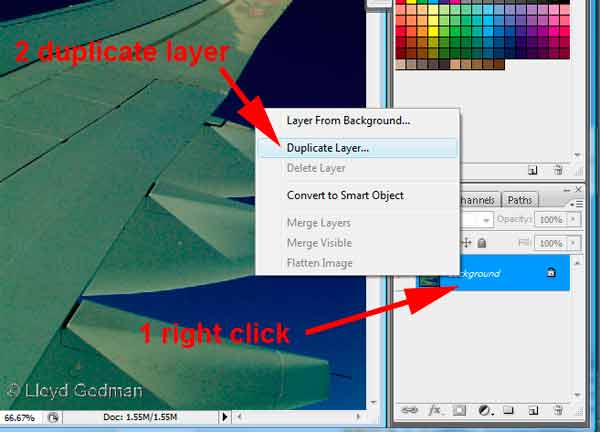
open your image and duplicate the layer by right clicking on it |
|
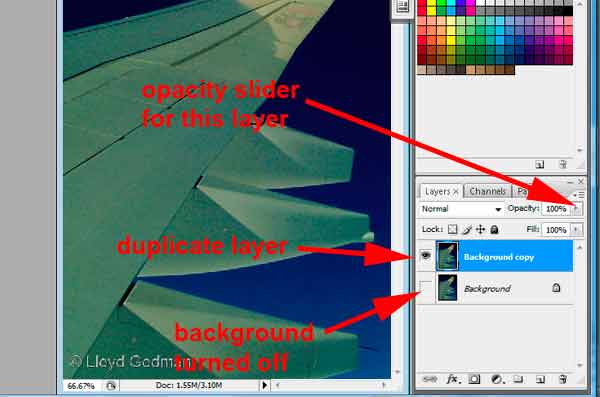
Switch off the background layer by clicking on the eye icon - note the layer activated is in blue -
you will notice the opacity is set on 100% |
|
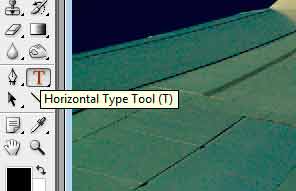
Select the text tool |
|
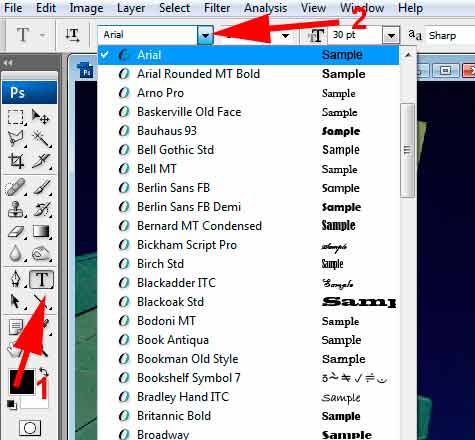
We can alter the font - the size and style for this |

|
Type in the text you want to associate with the image |
|
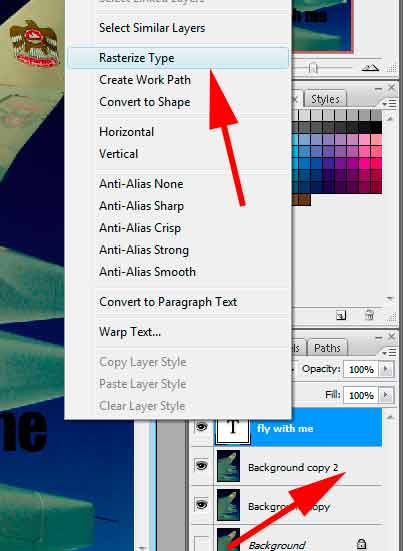
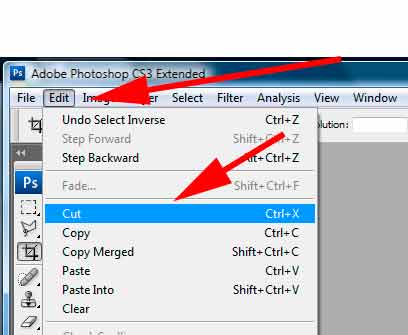
Next - by right clicking on the layer we have to rasterize the text layer and turn it to an image
we don't actually use this text in the image - it just as a template for the other layers
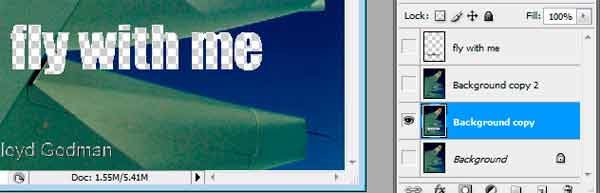
note we have also created a second duplicate layer |
|
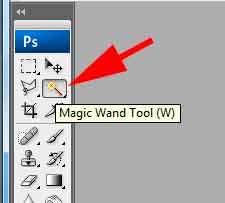
Once rasterized we click on the magic wand tool which lets us select the text area - |
|
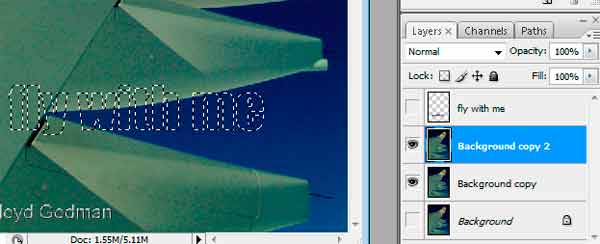
By holding down the shift key we can select each letter - then we turn off the text layer and activate the layer below - again the one in blue |

|
In the top or second duplicate layer adjust the opacity |
|
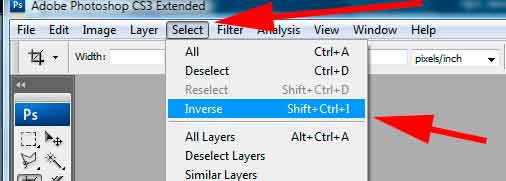
Then with the selection still made invert the selection which means we select everything except the text |
|
Then edit - cut |
|
With the text selected we cut the text of the layer below - |
|
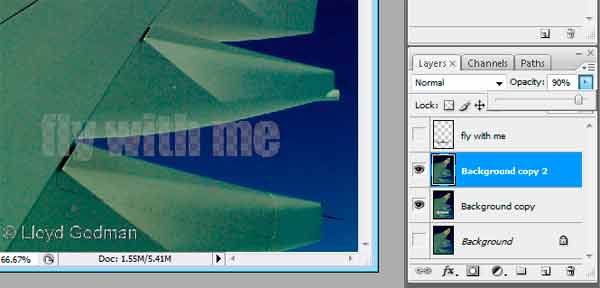
This gives us a layer on top with the text set on 90% opacity and the layer below with the same area of text cut out - so one fits over the other |
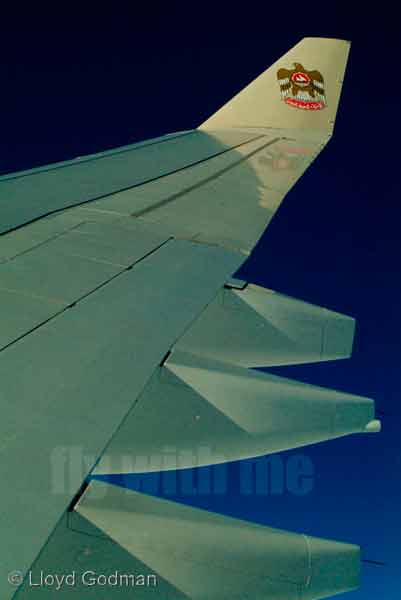 |
here is the final image - |

