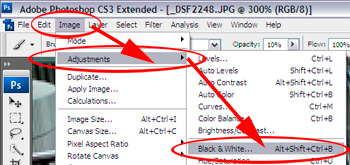
1. Convert the image to B&W in photoshop.
|

|
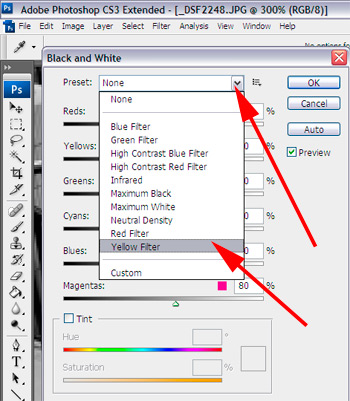
2. When you click on this dialogue box you will get various options that allow you to change the tonal relationships of the elements in the image. In the case below the yellow filter has been selected, which is similar to placing a yellow filter over the lens when you took the photograph.
|
 |
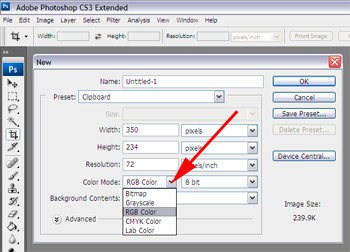
| 3. Once the image is converted to black and white copy the image - (on the key board hit - control A) and then paste it into a new file - (open a new file control N.) Make sure you select RGB in the color made or the image will stay as B&W. |
|
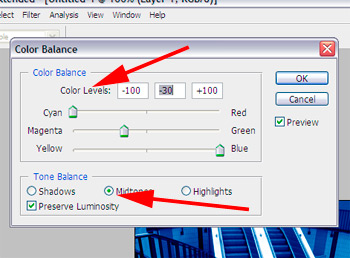
| 4. You can then set the colour balance to simulate the process you are using, in this case a cyanotype Note the levels and the option to select shadows - midtones and highlights |
|
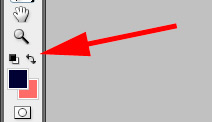
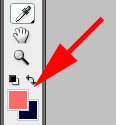
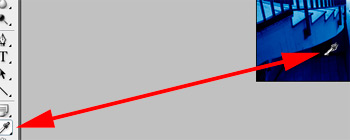
5. use the eye dropper tool to select a suitable colour to fill the background
Switch the background foreground colour
|
|
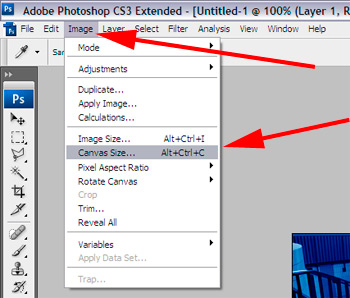
6. Select image - canvas size
|
|
Select percentage |
 |
| type in 150% or an appropriate % - you can match this to the size of the paper you are going to make the print on. |
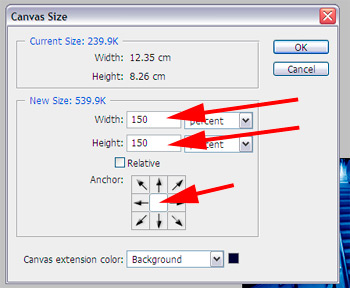 |
| You will place a large boarder around the print that has the same colour as the area you selected with the ye dropper. |
|
| Make sure that you have white selected as the background colour. |
 |
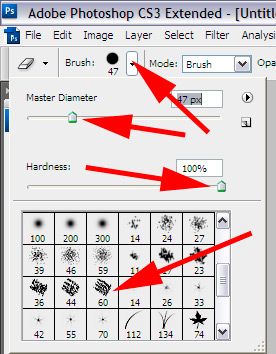
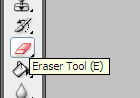 Select the eraser Tool Select the eraser Tool
|
|
| You can change the size, diameter, hardness and nature of the brush to suit. |
 |
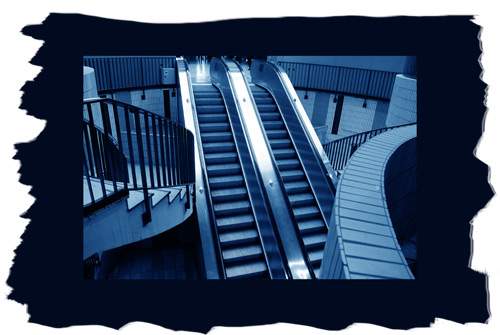 |
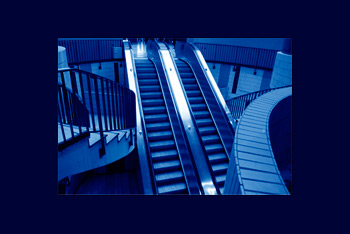
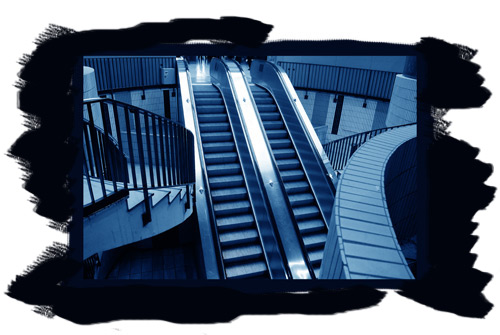
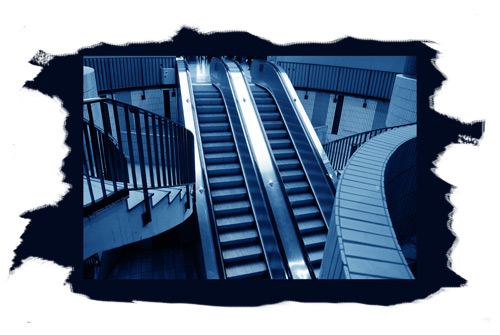
Use the eraser brush tool in photoshop erase away various areas. Look critically at how the areas of simulated emulsion at the edge relate to the image. |
Mouse over to view roll over image |
Here we see two areas where the emulsion has not been applied that connect with the lighter lines in the photographic element. This gestalt connect the two and draws the lines out to emphasis an make them longer. |
Mouse over to view roll over image |
|
 |
|
Mouse over to view roll over image |
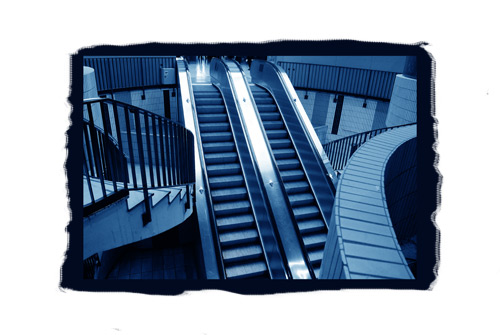
Here we see how the coating extends the large dark area - because it becomes relatively larger in relationship to other areas of the print it becomes visually more dominant. |