Sequence viewing > Index - Alternative Photo Emulsions - Resource - ©
Lloyd Godman
Alternative
Photographic Processes - (Hand
made photographic -emulsions and processes)
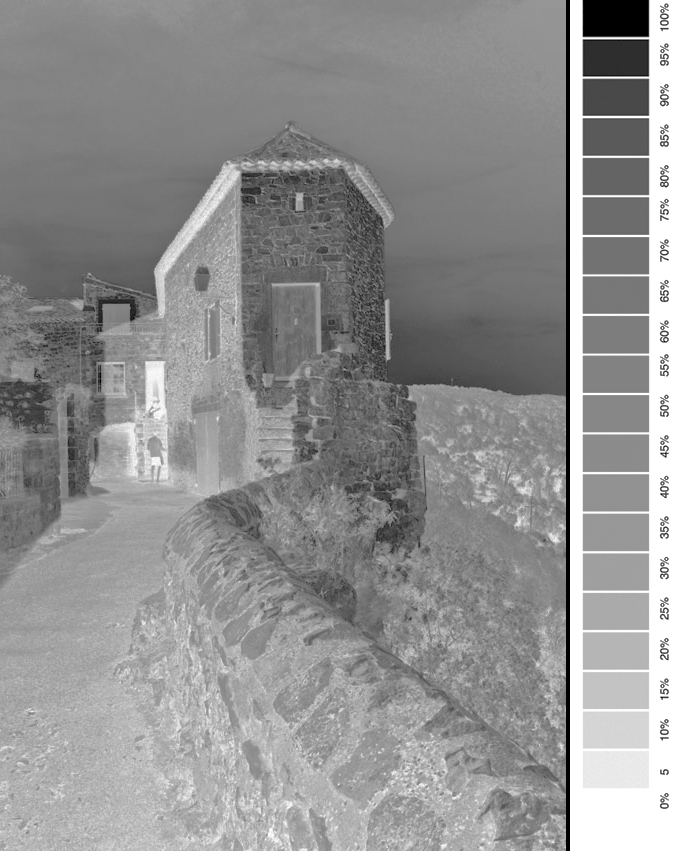
Curve Adjustment for a step wedge -

With alternative processes like the Cyanotype and Van Dyke Brown the tonal latitude of the process is most often shorter than the latitude of the tonal scale in the image
This is illustrated above where the tonal scale within the image is represented by the red line, the tonal latitude of the VanDyke Brown is the brown line and the latitude of the Cyanotype is the Cyan line. In the case of the Van Dyke Brown process, in effect what happens is the tonal information beyond the DMax and D Min ( D stands for Density).

What this means is that the tonal areas beyond the Dmax Dmin areas indicated for each process fail to record any texture detail and blend all the tone beyond the Dmax D min points as one tone - black or white. So in effect the image has more contrast and we lose detail in the highlights or white areas and like wise we lose tone in the dark areas or shadows.
While we can gain more tone in the highlights by exposing for longer, we then lose even more tone in the shadow areas - and likewise when we under expose to gain more tone in the shadows we lose greater amounts of tone in the highlights.Pl ease note, the images below are computer generated illustrations only!
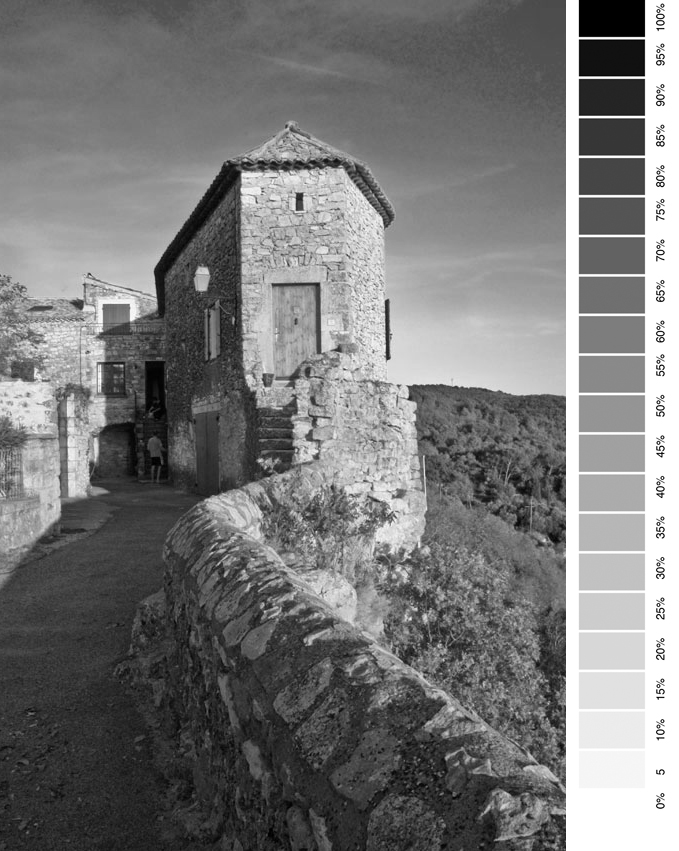 |
However, by altering the tonal curve in photoshop we can change the tonal relationship of the image to suit the process. When you do this, it is a good idea to insert a tonal step wedge along side the image - the step wedge acts as an accurate guide
Creating a step wedge |
We have a choice of working on the image as either a positive or a negative, but which ever system you use it is a good idea to stick to it - I prefer working on the image as a negative.
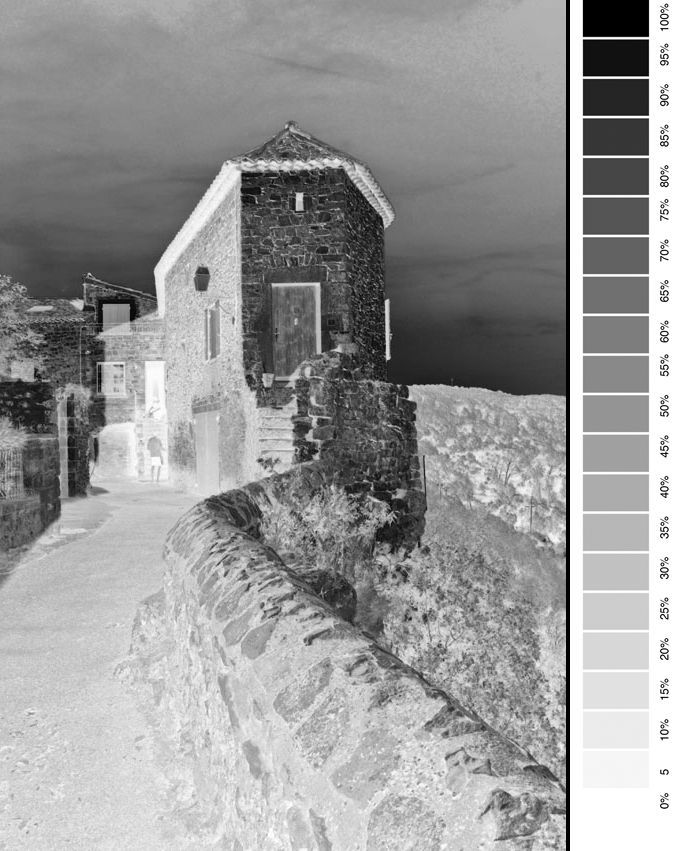
Tonally inverting the image to a negative |
Mouse over to view an illustration of how the image might look with the cyanotype from a negative with no curve applied.
When we print a transparent negative of the image and expose it via the selected process, we will find the tonality of the image is quite different from the image on the computer screen. As mentioned the highlights are likely to blow out and the shadows likely to block up. |
| |
|
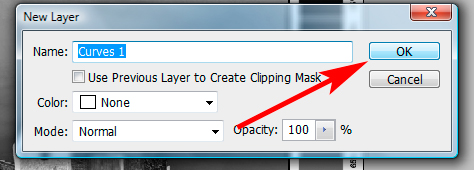
To add a curves adjustment layer - click -
• Layer
• New Adjustment Layer
• Curves |
 |
Then click
• OK |
|
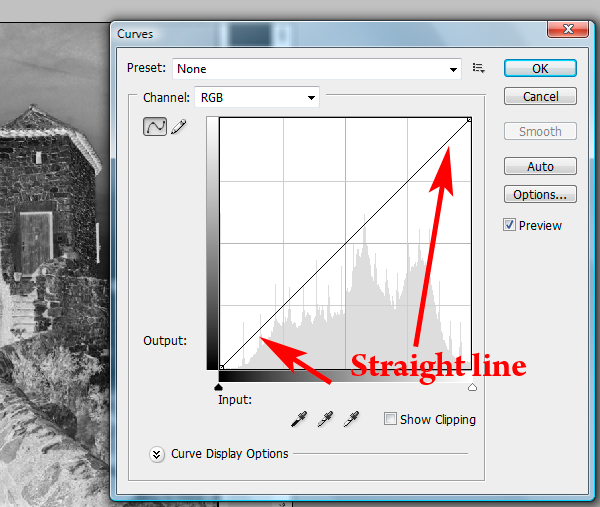
| You will see a histogram or graph with a straight line that represents the tonal range of the image from Dmax - (black) through to Dmin ( white) |
|
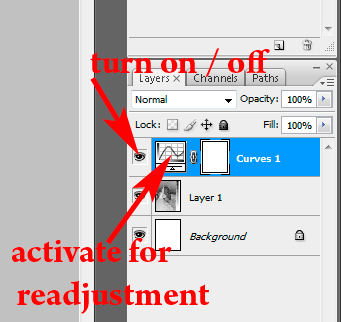
| If we click OK this curves layer will sit in the Layers dialogue box. Like any layer, we can turn it on or off, and then by clicking on it we can reactivate it so as the tone can be adjusted. |
 |
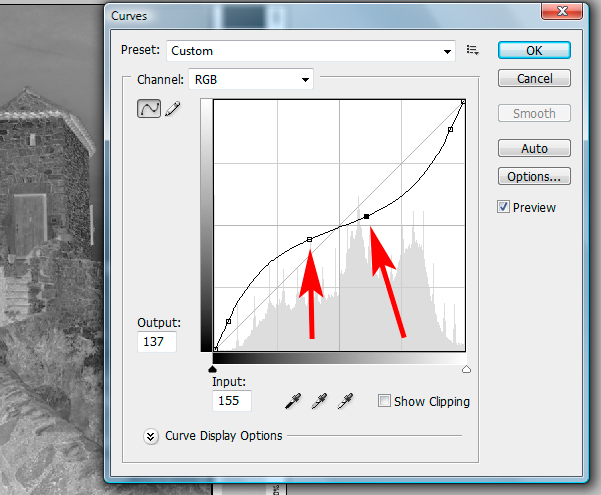
Mouse over to view effect of adjusting this point - notice how the light areas or shadows of the negative have become lighter |
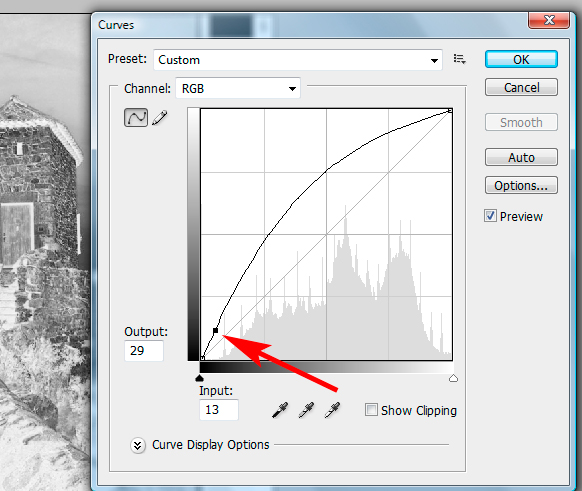
If we take a point in the shadow area we can push this up with the curser and the curve will alter accordingly
|
So this is how the negative looked after the first adjustment point
Mouse over to view effect of adjusting this next point - notice how we have pulled back some information in the lighter areas of the negative, and how the negative has become much flatter in tone. |
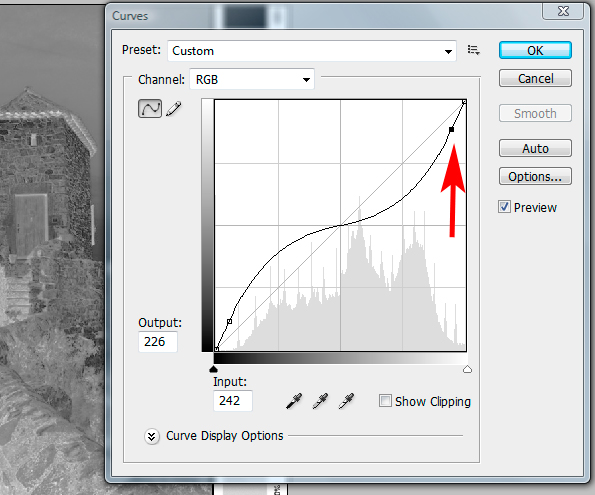
Likewise we can also adjust the highlights to make them softer by dragging the line down - notice how this creates an s curve
|
so this is how the image looked after the second adjustment point
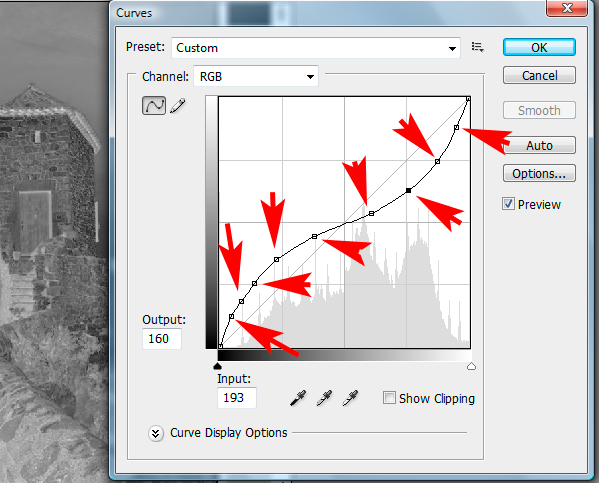
Mouse over to view effect of adjusting these new points - you will see that the over all effect is less dramatic and the effect is more in separating the mid tones. |
So as the mid tones do not become too flat we can adjust these to create a little more contrast
|

So this is how the negative looked after the mid tone adjustment
Mouse over to view effect of adjusting these new points as in the image on the right |
At anytime we can open the curve layer to readjust the tone |
|
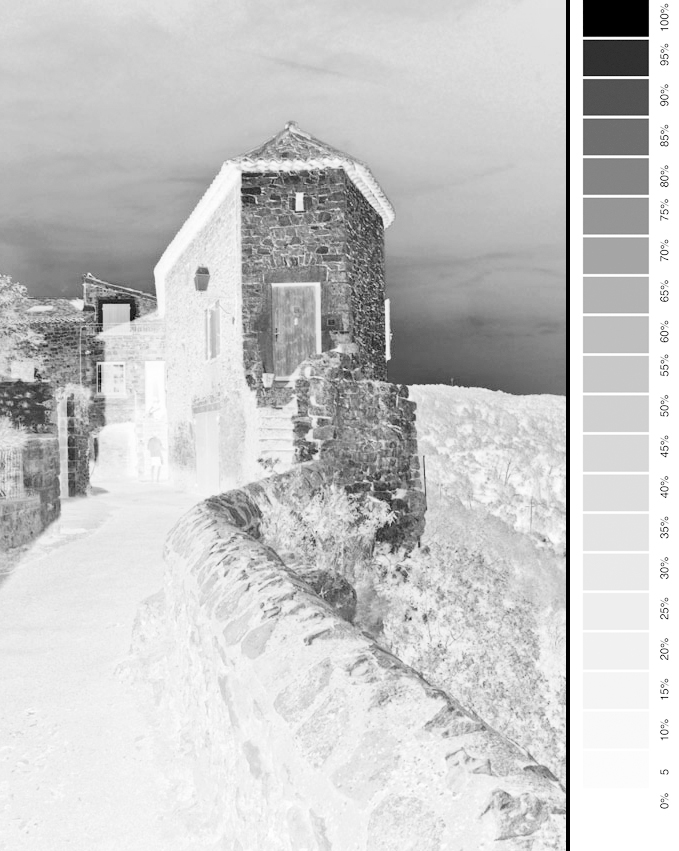
This is how the negative looked when we began - this is the readjusted negative as might be suitable for the cyanotype or Van Dyke Brown.
See how much flatter the image is tonally - there is less overall contrast |
Want to learn more? - do a workshop or one on one with Lloyd Godman
|