![]() Next
page
Next
page![]() Resource
Resource![]() Home ©
Lloyd Godman
Home ©
Lloyd Godman
Using the blur filter in photoshop
Traditional photographers would use various techniques of placing a filter on their lens and smearing Vaseline around the perimeter so the centre would be sharp and the perimeter progressively blurry. However while we can still do this today, many photographers create a similar effect in photoshop by selecting an area and then applying a series of blur filters.
Below is an example of how we might apply the blur filter.
|
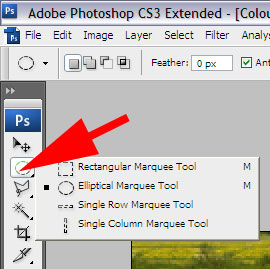
Once we have opened the image, select the elliptical Marquee tool |
|
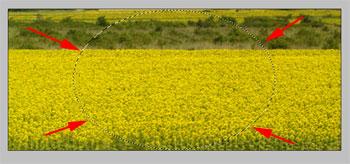
We use this to select an area we would like to apply the blur to in this case the ellipse in the centre.
|
|
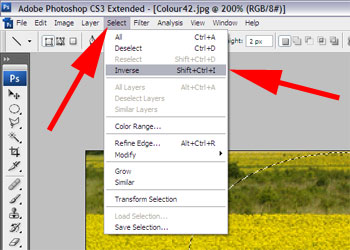
However we might like to apply this to an area outside the center, so as the center is sharp and the blur radiates out from this and the edges are the most blurred are of the image. We can easily do this by selecting Inverse - this will change the selection to everything out side the area. Of course the selection and inverse selection are very useful for all sorts of applications. They allow us to only make adjustments etc only to the selected area. |
|
Once we have the selection to the appropriate area of the image, we can then select the appropriate filter.
|
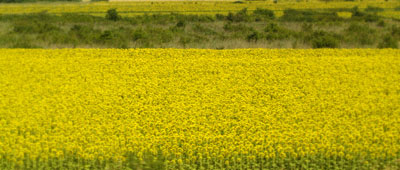
Here is the image with the blur filter applied in 6 blur steps. Roll over to view the original |
To create a graduated effect, we can do this in several steps each time selecting an are further out from he center and applying a small amount of blur each time. This creates a graduated effect where the center is sharp and gradually falls off towards the edge of the image. With each selection the ellipse get lager and works from the center towards the edge. |

Experiment with the different filters to see what they do.
![]() Comment on this resource
Comment on this resource