Converting colour digital images to Black
and white
Although most images shot with a digital camera are in colour, some subjects suit the graphic and tonal qualities of black and white. Most digital cameras have a setting that allows you to shoot the images in black and white. While this gives an instant effect, the camera software is processing and converting the the colour information in a manner that might not give the most effective results, and much tonal control is lost.
Shooting the subject in colour and later converting the colour information to Black and White in photoshop allows of far more tonal and contrast control - if layers are used, it can also be done in a way where the colour information is also retained.
Tonal control - colour to Black and White in photoshop CS5
 |
Shooting in colour and then converting to B&W allows us to control the tonal relationship of colour within the image. If we shoot in camera B&W mode this flexibility is lost.
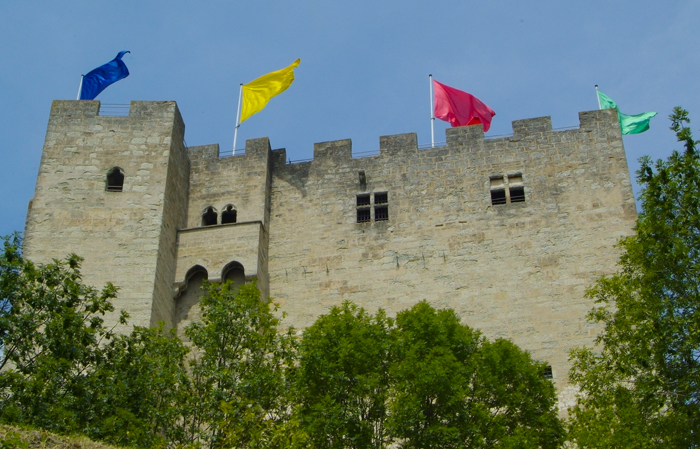
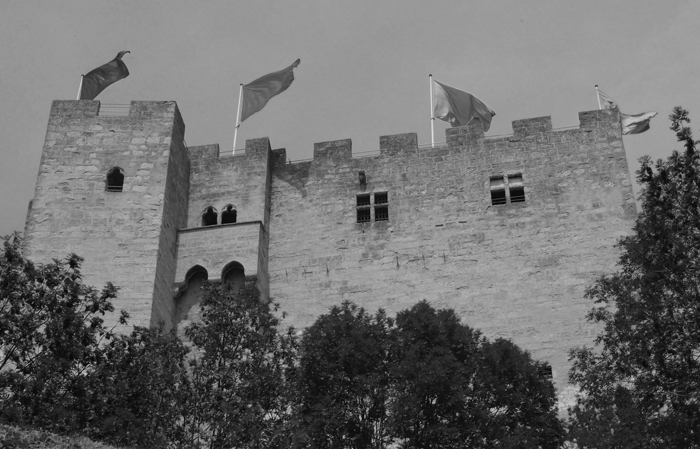
On the left is an image we will convert to B&W
notice there is are blue, yellow, red and green flags
We will convert using a B&W layer that allows us to adjust each of these colours |
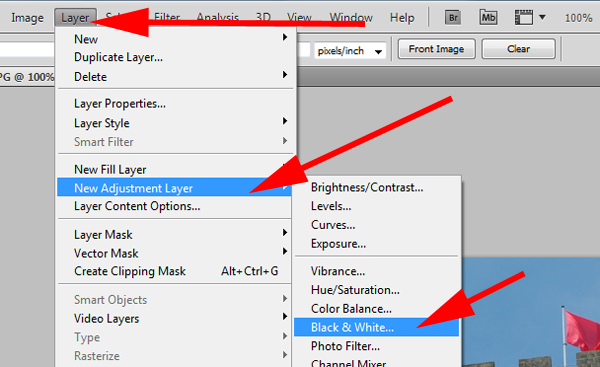 |
First add a new b&w adjustment layer - this will allow us to keep the colour image information adjust the b&W settings and control the degree in various areas through the use of a mask - and if we save the image with the layers, we can readjust all of these at anytime. |
 |
So click OK to activate the layer |
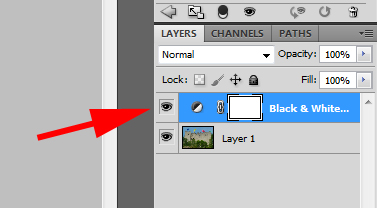 |
We see the B&W layer in the layers palette |
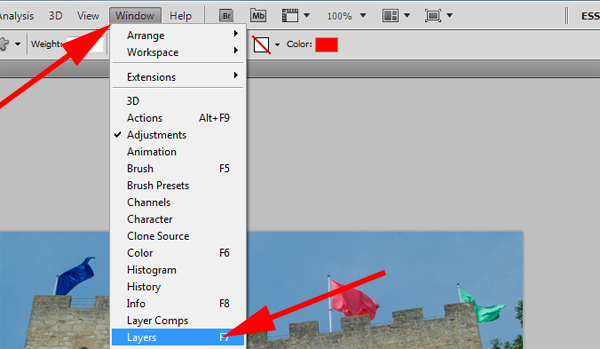 |
If the layers are not visible - then F& or window>> layers will reveal the palette |
|
When we open the adjustment layer we get a default setting with all the colours set at a mid range. This is how the camera might record the scene when set on B&W mode, however as I mentioned before the colour information would be lost. |
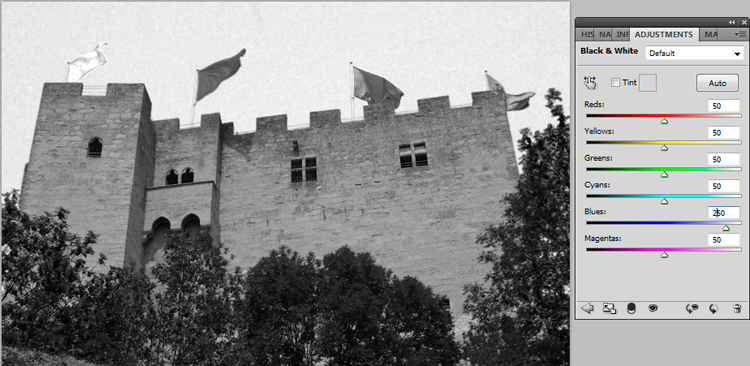
Mouse over to view original conversion without adjustment |
In this image you will notice the blue adjustment has been moved to the right to 250 while all the other adjustments are on 50
to illustrate the effect, we have done this to an extreme extent. |
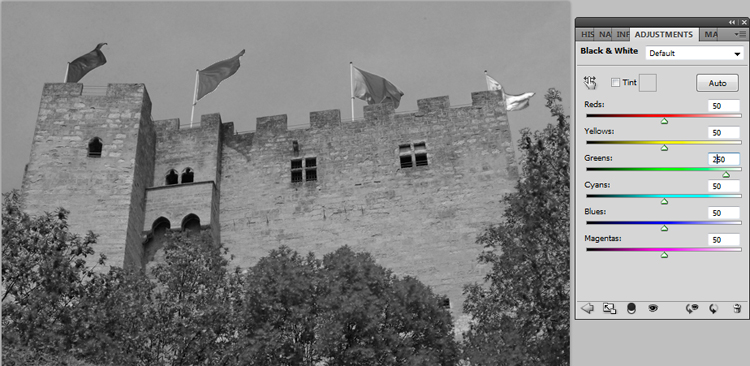
Mouse over to view original conversion without adjustment |
In this image you will notice the Green adjustment has been moved to the right to 250 while all the other adjustments are on 50
to illustrate the effect, we have done this to an extreme extent. |
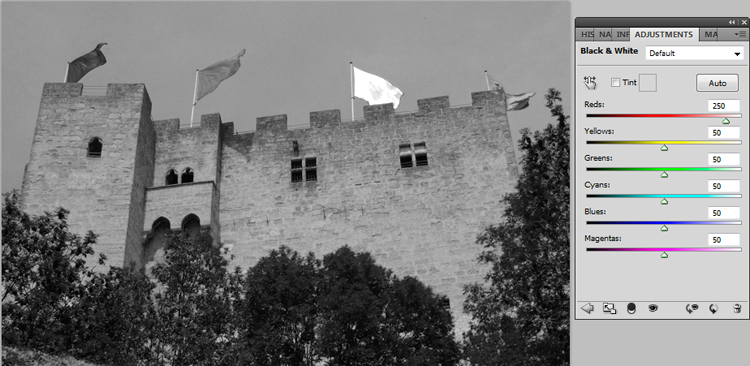
Mouse over to view original conversion without adjustment |
In this image you will notice the Red adjustment has been moved to the right to 250 while all the other adjustments are on 50
to illustrate the effect, we have done this to an extreme extent. |
 |
In this image you will notice the Yellow adjustment has been moved to the right to 250 while all the other adjustments are on 50
to illustrate the effect, we have done this to an extreme extent. |
more infomation