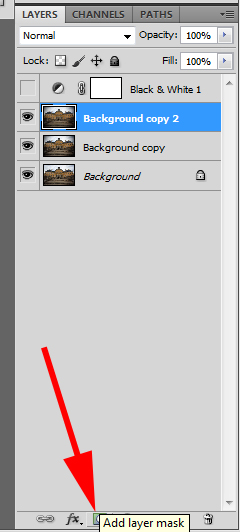
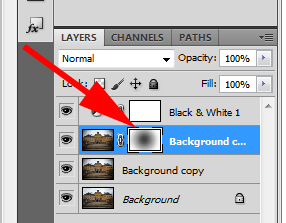
This is from a sequence on vignettes and shows how to add a layer mask to a layer that has been blurred
Click this icon to add a mask to the layer
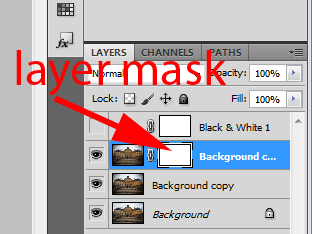
We see this come up as a white rectangle in the layer. This means we can paint into the white to create an effect.
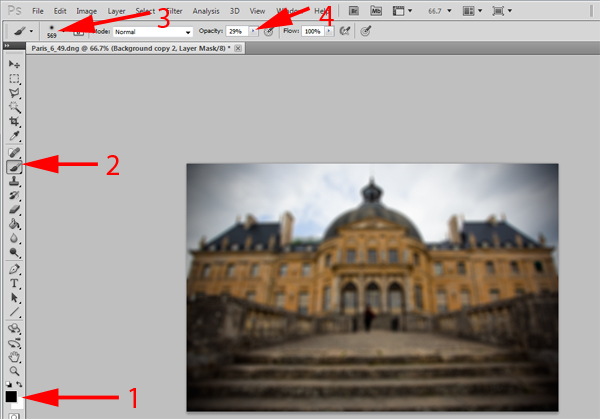
1. So we want to select the foreground colour as Black and background colour as White
2. Select the brush
3. Alter the size of the brush to suit
4. You can alter the opacity ( transparency or how great the effect will be)
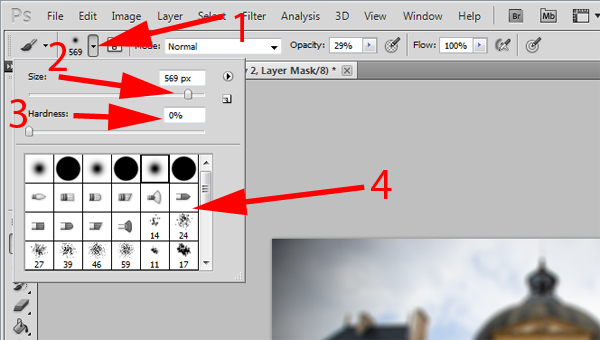
1. When we click on the Brush
an options palette will open that allows us to adjust;
2. the size
3. the hardness - In this case we want a soft brush where the edge fades off so we select 0%
4. a range of other brush shapes
When this is applied to the center the mask reveals the layer below in only the area the brush is applied in.
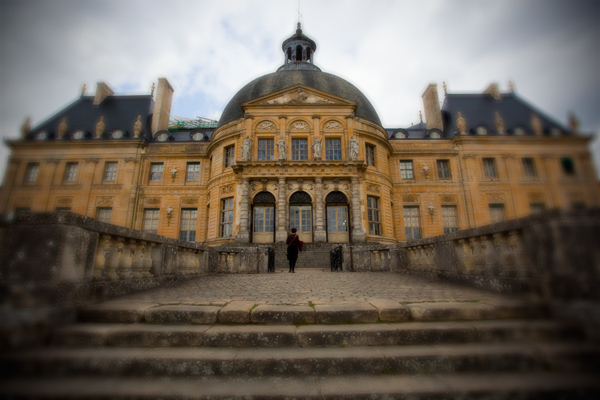
mouse over to view B&W image
Here we see th mask associated with the layer now has a black area that corresponds to where we applied it
If we save the image with all the layers as a Tiff - we can open the image and apply th eblack brush again for greater effect or change the foerground colour to white and apply it to reduce the effect.