Manual
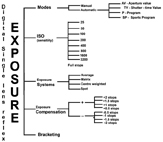
Exposure Mode (M) - Applicable to both film and digital SLR cameras
This
is where the photographer selects both the shutter
speed and aperture.
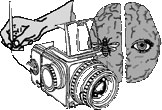
This diagram is mapped, click on a section for more information - the small diagram on the left will take you to the main exposure map

Overview
While
this using this mode takes longer than automatic to select the setting
and take the photograph, it allows the photographer
to take total control of all the creative settings associated
with exposure.
Light comes through the lens and is read by a series of sensors inside the camera - the meter is most often turned on for a period of time by pushing the shutter button half way down. Pushing it all the way down releases the shutter and takes the image.
Each frame can be treated in an individual
manner. Because of this,the photographer is more likely
to consider the relationship of the aperture setting
to depth of field and/or the shutter setting to camera
shake or subject blur. Use this manual mode to take you images in a more considered manner.
So it is very good to use for subjects that are static like landscapes, still life etc, - where you have the time to calculate the exact exposure. The manual mode works well with the histogram to check the range of dynamic tones recorded by the exposure.
|

|

Viewfinder info of Canon 5DII

Viewfinder info of Canon 5DII - 1/3 stop settings
Dial Location - Aperture - Shutter
To take photographs in Manual Mode, you need access to two controls. Aperture and Shutter. There is one dial which rotates and controls the aperture setting - and another dial rotates and controls the aperture. Various camera makes and models have these located in different places and configured in slightly different ways. Because these dials are also used for other settings they are sometime called main and sub control dial. On some cameras there is only one dial and you hold a button down to alternate between aperture and shutter.
Check your camera manual for their location. |
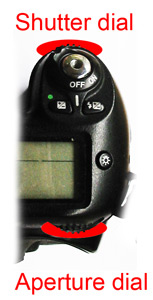 |

rotate left for a longer exposure - say 1/60 1/30sec
rotate right for a faster exposure - say 1/60 1/125sec
|

rotate left to open the aperture or set it on a wider f stop - say f8 to f 5.6
rotate right to close or stop down the aperture or set it on a smaller f stop - say f8 to f11
Aperture chart |
Viewing the settings
Usually there are two place to view the aperture and shutter settings.
One is a window on the top of the camera, which allows the photographer to view the exposure in difficult situations where they can not see through the viewfinder.
On the top of the camera is a window with information about the two components that relate to exposure - the shutter speed or time value TV. In this situation it is on right reading 60. The 60 actually stands for 1/60 second. Because this setting can easily be confused with seconds to denote that the shutter speed is in full seconds there is usually another punctuation beside it.
The other figure F3.8 relates to the opening that lets the light in - the aperture.
As the dials are rotated the related aperture or shutter numbers alters.
|
 |
Fractions of seconds & full seconds
Because this setting can easily be confused with seconds to denote that the shutter speed is in full seconds there is usually another punctuation beside it, in this case a 30". So keep an eye out for this as you set the shutter speed.
|
 |
Dim light illumination
In dim light this window is often automatically illuminated.
|
 |
The other location is inside the viewfinder - it is usually located below
the scene on the screen., which allows the photographer to see the settings as they are framing the subject.
Below a scene, viewed through the viewfinder, are a series of numbers and symbols. Again different camera manufactures use slightly different ways of presenting this information, but generally this looks typically like the diagram on the right.
|
 |
The 0 and longer vertical line in the centre indicates a central position where the exposure is correct. The scale on the left and right of this central position is denoted in what are called one stop intervals - in this case 1,2 & 3 stops. |
 |
| If the exposure is too great the indicators will light up on the left of this central position - hence the + symbol. Often the indicators light up in 1/2 or even 1/3 stop intervals. In this case the images would be 2 1/2 stops over exposed and we would need to rotate the dial to centre the indicator lights and get the correct exposure. |
 |
| If the exposure is not enough, the indicators will light up on the right of this - hence the - symbol. In this case 1 stop under exposure |
 |
| In the case where the exposure is over or under by more than 3 stops all the indicator lights will come on. |
 |
On most
cameras, the +/- Exposure compensation
setting can be used in conjunction. This will often allow
up to 2stops over or under exposure.
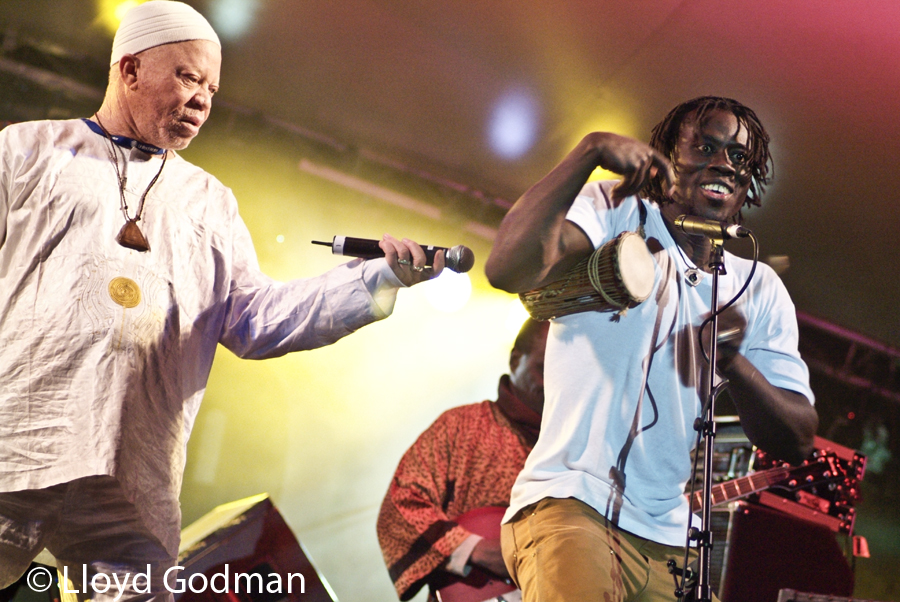
| I
used a manual mode to shot this image of Selif Keita at
WOMAD. |
|
Understanding the various settings
The aperture is a variable opening that controls the amount of light falling on the sensor
In an SLR, the shutter is most usually a series of two blinds - when the shutter opens - one blind moves across the opening letting light onto the sensor it is then followed by the other sensor. The time differential or physical distance between the binds determine the shutter speed. With a fast shutter speed like 2/000 sec, there is only a narrow slit between the blinds and the slit of light actually moves across the sensor. .However in much longer shutter speeds of say 1sec - the first blind has completed its movement - there is a time gap when the sensor is entirely exposed and then the second blind moves a cross and closes the frame opening.
In some cameras the blinds move vertically.
Together the aperture an shutter con troll the AMOUNT OF LIGHT that reaches the sensor.
So it is possible to have a long or slow shutter speed with a narrow, small or stopped down aperture - or a fast shutter speed with a wide aperture and still have exactly the same amount of light fall on the sensor.
However, while the amount of light reaching the sensor is the same, fast and slow shutter speeds have an effect on moving subjects, camera shake and blur - check out shutter
and wide and narrow apertures have an effect on the depth of field or amount of apparent sharp focus in an image. Check out aperture
Investigations and experiments
Comment on this resource
Want to learn more? - do a workshop or one on one with Lloyd Godman
|
