![]() Home
Home![]() next
page
next
page
Working towards THE FINE ART PRINT
"The difference between various stages of work prints leading to the fine art print are often subtle, and require meticulous craftsmanship. Even with the best equipment and competent procedure, the control of print quality is sometimes very difficult. I know from experience that there are now short cuts to excellence. Inadequate attention to procedure or archival considerations will yield less-than-optimum results. However, the technical issues of printing must not be allowed to overwhelm the aesthetic purposes: the final photographic statement should be logical and complete, and transcend the mechanics employed.
Frequently you will find that several means are available to achieve a desired effect. Judgment and experience are required to make such choices efficiently and I urge you to approach the learning process with patience..
"In printing we are trying to breathe expressive life into the image, and this raises intangible issues that do not yield to formulas and measurements." Ansel Adams
Fine art print is a term that Ansel Adams reserved for those photographs that met the highest standards of technical excellence
All the intermediate prints between the proof sheet and the fine art print are called work prints.
Each work print represents a discrete step along the way to the making of this final print.
Step1
Examining the Proof sheet.
The
first step to producing the fine art print is to evaluate the your
proof sheets. When you do this try to detach your self from the what
you were experiencing at the time you took the photographs and look
at the image from a critical point of view. The first quality to look
for in the image is the content. Does the image convey the message
you intended. Do not concern yourself with such issues as image contrast,
light and dark values or small details that might distract the eye
- such problems can often be altered or even eliminated at the time
the print is made, and in fact this is one of the aims of fine art
printing , to extract the full potential from the negative to support
the message.
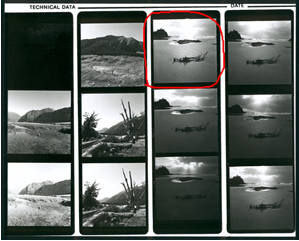
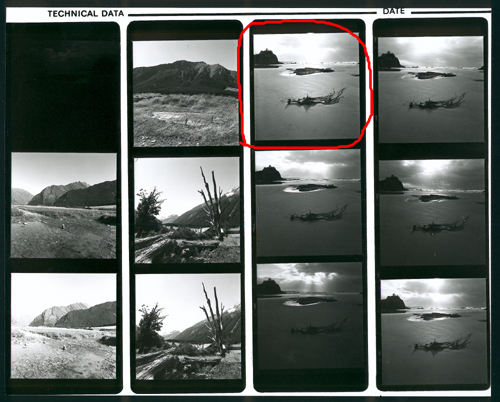
Many photographers will often take two or even more exposures of a shot they know is special for no other reason than insurance if there is a problem in the other ie drying marks, dust, hair, scratch etc. But sometime these two images may also have slight differences like the slight displacement of an object, slightly more texture on a plane of an object, even clouds moving across a subject can have a dramatic effect in the final image.
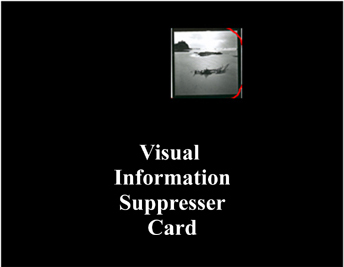
With
35mm it can be difficult to isolate the images and a hole
the same size as a single frame, cut in a piece of plain
card can be used to suppress the visual confusion of the
other images. With 120 the same method can be used but proofs
from larger neg's are much easier to read.
|
|
With 35mm making the final choice could involve making small work prints to select from.
![]() comment
on this resource
comment
on this resource